How to Paste on Mac: The Ultimate Guide to Mastering Your Clipboard
Learning how to paste on Mac might seem like one of the most basic computer skills, but the truth is, Apple’s macOS offers a rich set of clipboard features that many users never fully explore. Whether you’re a new switcher from Windows, a longtime Mac user who’s never ventured beyond the basics, or someone looking to supercharge their productivity, understanding the various methods of pasting can dramatically improve your workflow. This fundamental action is the bridge between finding information and using it, making it a critical part of your daily digital routine. From simple text transfers to moving formatted content and even files between applications, mastering the paste function is a small skill with a massive impact. This comprehensive guide will walk you through every method, hidden trick, and powerful tool available to transform how you handle information on your Apple computer. We’ll cover everything from the absolute fundamentals to advanced techniques that can save you hours.
The Absolute Basics: How to paste on Mac
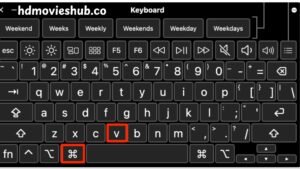
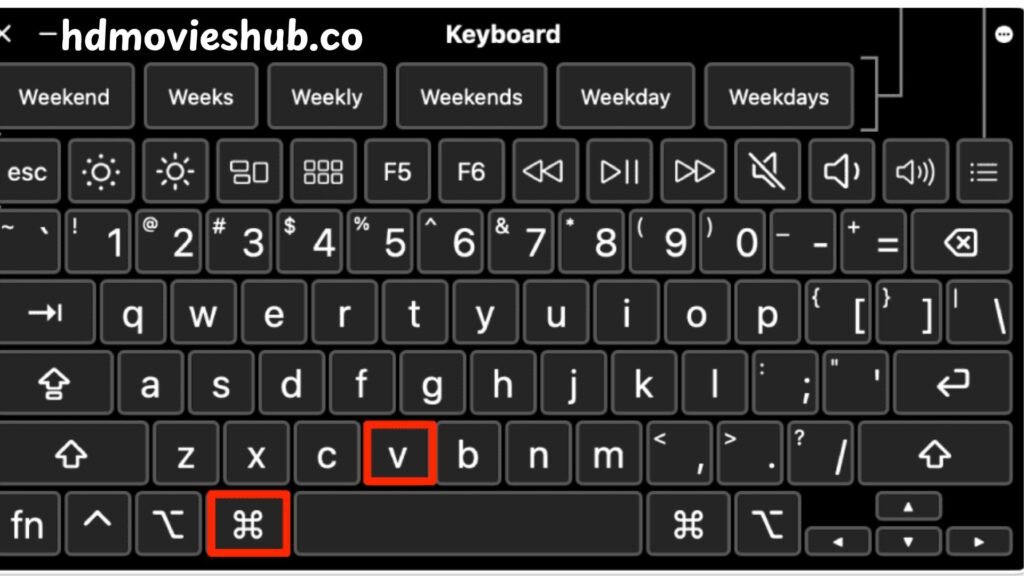
Let’s start with the foundation of how to paste on Mac. The primary way to paste on a Mac is also the simplest. Once you have something copied to your clipboard—whether it’s text, an image, or a file—navigate to where you want to place it and press the Command (⌘) + V keyboard shortcut. This action tells your Mac to insert the clipboard’s contents at the current cursor location. It’s the universal method that works across virtually every application, from word processors like Pages or Microsoft Word to web browsers like Safari and Chrome. If you prefer using menus, you can also click on the “Edit” menu in the menu bar at the top of your screen and select “Paste” from the dropdown list. This method is identical in function to the keyboard shortcut.
For those using a Mac notebook with a Force Touch trackpad, you can also perform a secondary click (a two-finger tap) to bring up a context menu that includes the Paste option. This is particularly useful when you’re working without an external mouse. It’s important to understand what happens when you paste. The standard paste command (Command + V) will typically try to maintain the original formatting of the copied content. This means if you copy bold, red, size-14 text from a webpage and paste it into your document, it will likely bring all that formatting with it, which isn’t always desirable. We’ll cover how to handle that in the next section. Know about How to Paste on Mac.
Beyond Basic Pasting: Paste and Match Style
Have you ever copied text from a beautifully designed website only to paste it into your document and create a visual mess with clashing fonts and colors? This is where the “Paste and Match Style” function becomes your best friend. This powerful feature strips away the original formatting (like font type, size, color, and hyperlinks) and pastes only the plain text, adopting the styling of the document you’re pasting into. It’s the secret to maintaining clean, consistent formatting across all your work. The keyboard shortcut for how to paste on Mac is Option + Shift + Command + V.
Think of it this way: standard pasting is like cutting a photo out of a magazine—you get the image plus the background paper it was glued to. Paste and Match Style is like carefully tracing just the image onto your own paper. This command is invaluable for writers, students, and professionals who regularly compile information from multiple sources. For example, when researching for a paper, you can copy quotes from various online journals and use Paste and Match Style to ensure they all blend seamlessly into your document without any manual reformatting. Most mainstream applications support this function, and you can also find it in the “Edit” menu, usually right below the standard “Paste” option.
Mastering the Clipboard: Viewing and Managing Your History
A significant limitation of the standard Mac clipboard is that it only remembers the last thing you copied. This changes dramatically if you enable Apple’s built-in clipboard manager. Introduced in macOS Mojave (10.14) and improved since, this feature allows you to see a history of your recently copied items—text, images, links, and more. To enable it, go to System Preferences > Keyboard > Shortcuts and check the box for “Use keyboard shortcuts to copy and paste” under the “App Shortcuts” section. Once activated, pressing Command + Shift + V will bring up a visual history of your clipboard.
You can then use the arrow keys to select a previous item and press Enter to paste it. This is a game-changer for productivity. Imagine working on a complex project where you need to copy several different addresses, code snippets, or names. Instead of constantly switching back and forth between applications to re-copy items, you can copy them all once and then select from your history when you need them. For even more powerful clipboard management, third-party apps like Paste, CopyClip, or Alfred (with the Powerpack) offer extended history, the ability to pin frequently used items, and synchronization across devices. The table below compares the native macOS solution with a popular third-party alternative.
Comparison of Clipboard Management Solutions on Mac
| Feature | macOS Native Clipboard History | Third-Party App (e.g., Paste) |
| History Length | Limited (last ~10 items) | Extensive (hundreds or unlimited) |
| Preview | Basic text preview | Rich preview for text, images, links |
| Pinning Items | No | Yes |
| Search Function | No | Yes |
| Cross-Device Sync | No (unless with Universal Clipboard) | Often Yes |
| Cost | Free | Usually Paid or Freemium |
The Magic of Universal Clipboard Across Apple Devices
One of the most impressive features within the Apple ecosystem is the Universal Clipboard. This allows you to copy content on one Apple device—like your iPhone or iPad—and instantly paste it on your Mac, and vice versa. It seamlessly extends your clipboard across all devices signed into the same iCloud account. To use this magic, you need to ensure a few things are enabled. First, all devices must be signed in with the same Apple ID. Second, Bluetooth and Wi-Fi must be turned on. Third, both devices must have Handoff enabled. You can find this setting on your Mac under System Preferences > General > Allow Handoff between this Mac and your iCloud devices.
On iPhone or iPad, it’s in Settings > General > AirPlay & Handoff. Once set up, the process is simple. Copy text or an image on your iPhone as you normally would. Then, within a short period (usually a couple of minutes), move to your Mac, place your cursor in any text field, and press Command + V. The content from your phone will appear. This is incredibly useful for transferring links from your mobile browser to your desktop, moving notes quickly, or even copying a verification code received via text message on your phone directly into a form on your Mac. According to Apple’s official support documentation, the content remains available to paste on your other devices for a short time or until you replace it by copying something else on any device.
Advanced Pasting: Right-Click Menus and Drag-and-Drop
While keyboard shortcuts are fast, macOS also provides intuitive graphical methods for pasting. The right-click (or Control-click) context menu is a central hub for pasting options. When you right-click in most applications, you’ll see a menu appear with relevant actions. The “Paste” option is almost always present, and in many modern and first-party Apple apps, you may also see “Paste and Match Style” here as well. The context menu is dynamic and can sometimes offer smart actions based on what’s in your clipboard, such as “Paste as Plain Text” if you’ve copied richly formatted content.
Another powerful, often overlooked technique is drag-and-drop. macOS has supported this since its earliest days. You can often select text, an image, or even a file, click and hold on the selection, and then literally drag it to another application window and drop it in. For instance, you can drag a photo from the Photos app directly into an email composition window in Mail, or drag a paragraph of text from a PDF preview into a TextEdit document. This action effectively performs a copy-and-paste operation in one fluid motion. It’s a highly tactile and direct way to move information, and it bypasses the clipboard entirely, meaning it won’t overwrite whatever you last copied. This is perfect for when you have something important on your clipboard that you don’t want to lose but need to quickly move another piece of information.
Conclusion
Knowing how to paste on Mac is about far more than just a simple keyboard shortcut. It’s about understanding the tools at your disposal to manage information flow efficiently and effectively. From the foundational Command + V to the formatting-cleansing power of Option + Shift + Command + V, these commands form the backbone of daily computer use. By exploring the history feature of the modern macOS clipboard and leveraging the magic of Universal Clipboard, you can create a seamless workflow across all your devices. Remember that the right-click menu and intuitive drag-and-drop offer robust alternatives for when you need a more visual approach.
The key to true proficiency is practice. Start incorporating “Paste and Match Style” into your routine to avoid formatting headaches. Take ten minutes to enable and test the clipboard history feature to see how it can save you time. Finally, ensure Handoff is activated to experience the convenience of the Universal Clipboard. Mastering these techniques will make your interaction with your Mac smoother, faster, and more intuitive, turning a basic action into a powerful productivity booster. For more tips on getting the most out of your Apple devices, explore our guide on essential Mac shortcuts for beginners.
FAQs
Q: Why is my paste shortcut not working on my Mac?
A: This can happen if the application you’re in doesn’t support pasting, if there’s nothing currently copied to your clipboard, or due to a temporary software glitch. Try restarting the app or your Mac.
Q: How to Paste on Mac without a keyboard on a Mac?
A: You can right-click (or two-finger tap on the trackpad) in the desired location and select “Paste” from the context menu that appears on your screen.
Q: What is the difference between Paste and Paste and Match Style?
A: Paste inserts the content with all its original formatting intact, while Paste and Match Style strips the formatting and makes the text adopt the style of the document you’re pasting into.
Q: Can I see a history of everything I’ve copied on my Mac?
A: The native clipboard only remembers the last item, but you can enable a limited history view in System Preferences under Keyboard > Shortcuts. For a full history, you need a third-party clipboard manager app.
Q: How do I paste something from my iPhone onto my Mac?
A: Use the Universal Clipboard feature. Ensure both devices are signed into the same Apple ID and have Handoff enabled. Copy on your iPhone, then simply use the Command + V shortcut to paste on your Mac.
Now you are clean on How to Paste on Mac?